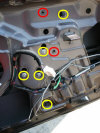
- Standard Screw Driver, long.
- Cross Tip Screw Driver, #2
- Screw Driver Kit W/ Torque Bits, T-15 & T-20
- 1/4" Ratchet
- 10mm Socket
- 8mm Socket
- Needle Nose Pliers
- Glass cleaner (if you have tint on the glass, use something to safe for tint).
- Paper towels
Technology Instructions
NOTICE
These instructions are offered "As Is" and at your own risk. AtTheTipWebs.com, any of our staff members, affiliates, etc. are not responsible for any problems that may occur as a result of the use of these instructions, tips, procedures, etc., nor do we offer any support of any kind by phone, visit, or by e-mail, etc. By using these instructions, tips, procedures, etc., you accept all responsibility and liability for the results that occur.
Click here to add this page to your Favorites / Bookmarks! |
Contact Us / Request Help | Send Donation Here |
Door Instructions - For 2000 through 2004 Jeep Grand Cherokee
These instructions are designed to guide you through the step by step process of replacing or repairing the window motor/track assembly. These instructions will also show you how to remove the following items:
Door Panel
Door Speaker
Front Window
Door Window & Lock Controls
As the story goes, we (my family) pulled into a parking lot, got out of the truck, closed the door, and watched the passenger side window slowly go down all by itself. Got back in the truck and tried to roll it back up, no movement at all. We could hear the motor doing something but still no action. So we drove home with the window down, in 100 degree heat (ouch).
So I tore into it the next morning to learn that the top cable was off the track. It was also un-hooked from the track mechanism. So, I hooked it all back up just to have it break again within 5 minutes. Took everything back apart and learned that the top cable end was pulling through the plastic track mechanism. Called the local Jeep parts department and they said you have to purchase the entire window assembly for $275. Called NAPA and they said they have a replacement for $112 and the salvage yard wanted $80. Would rather pay $112 for a new one than pay $80 for a used one. Being a person that always tries to fix the broke one (Free is always better than $112), I took some Quick Steel and applied it to the track mechanism with the cables in place.
Allow 1 hour to do the entire job. I try to detail all of the instructions I do to make them so a 10 year old could follow them. Because of the tension in the cable (if a repair of the assembly is attempted) I would not ask anyone younger than 14 to do it.
If you find these instructions useful, please take a few minutes and express your appreciation by leaving me a TIP/DONATION in my PayPal account (any amount would be appreciated, $10 would be great).
Tools Needed:
|
Stuff For Cleaning
|
Instructions: Please read the ENTIRE step before you perform it.


NOTE: Put everything back together in the reverse order. After you are done you will need to clean the window, it will be greasy.
Please leave a donation, any amount appreciated. See the bottom of this page.
These instructions were modified on 07/02/2012.
I hope these instructions were helpful to you. Please take a minute and leave me a donation, yes I do need it. Click Here.