Blower Motor Removal - Volvo 850
These instructions will guide you through the removal of the blower motor in a 1995 Volvo 850. I'm sure these instructions will likely work on other 850 Volvo's, just not 100% sure which ones. I took my motor out because it was squeaking a little. When I purchased my first 850 about 2-1/2 years ago, the blower motor in it was squeaking. A couple of month later it didn't want to turn so I took it out, lubed it, and it worked for a few years (was still working when I sold the car).
The reason the motor was squeaking is because the bearings in it needed lubed. They start squeaking because they are going or have gone dry. Failure is soon to follow but that can be avoided or at least delayed if you lube the motor. The motor cost $170 so I think it's worth the hour it takes to lube the squeaky motor.
When I took the motor out, I also removed the cage because it is almost impossible to lube the cage end of the motor with the cage on. Another thing, the glove box screw holes will likely be damaged by removing the screws and glove box from the dash. If you notice pieces of the glove box stuck to the dash leave them there, it may reduce the damage to the glove box when you put it back together.
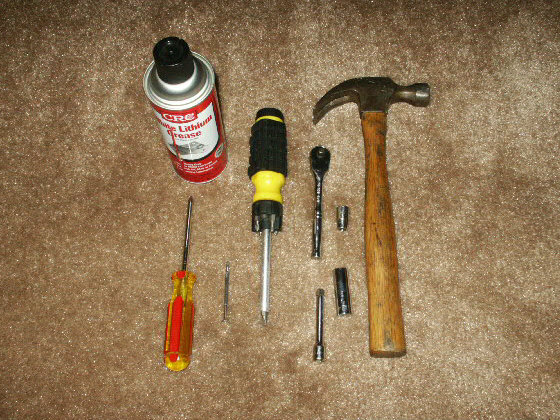
Tools / Supplies Needed:
| White Lithium Grease | Hammer |
| Screw Driver | T-15 and T-25 Torque Bits |
| 13 mm Socket | 1/4" Socket Driver |
| Socket Driver Adapter | Short Socket Extension |
| Extra Small Driver | Phillips Screw Driver or Punch |
| Something to support the cage for removal. I use a house dryer vent tube adapter, some use 2x4's. |
Instructions:
-
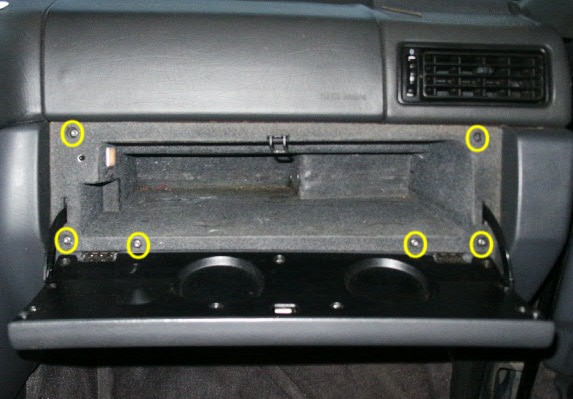
Empty out your glove box.
-
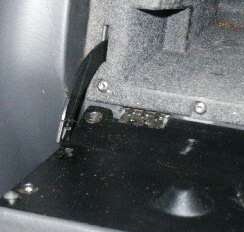
Take the extra small screw driver and release the hinges on the glove box door. You have to slide the driver in the slot on the right side of the hinge where it connects to the door. Once you slide it down far enough you will release it, almost automatically.
-
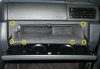
Remove the screws that hold the glove box in. There are 6 T-25 screws.
-
Remove the glove box. It will just pull out, I usually use both hands. You will have to work the top center of it around the latch.
-
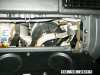
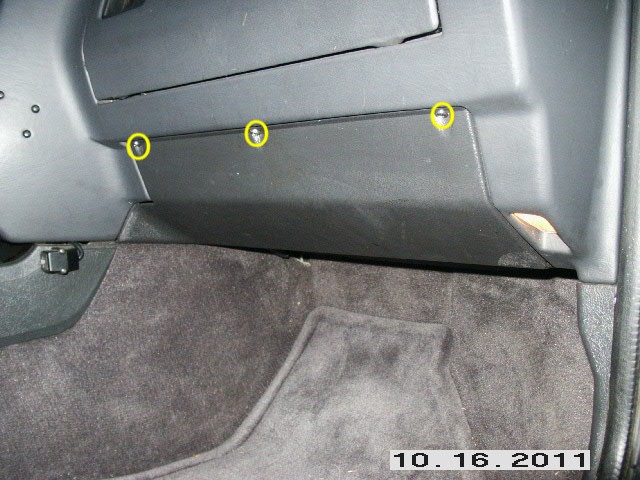
Remove the lower dash panel. It has 3 T-25 screws. Take the screws out and work it down and out.

-
Remove the knee bolster. It is suppose to have 4 13mm nuts in the slots on either end (mine only had 2 in it). Once you get the nuts off you will have to work it down a little, to the left a little, then out.
-
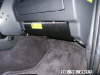
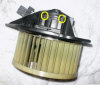
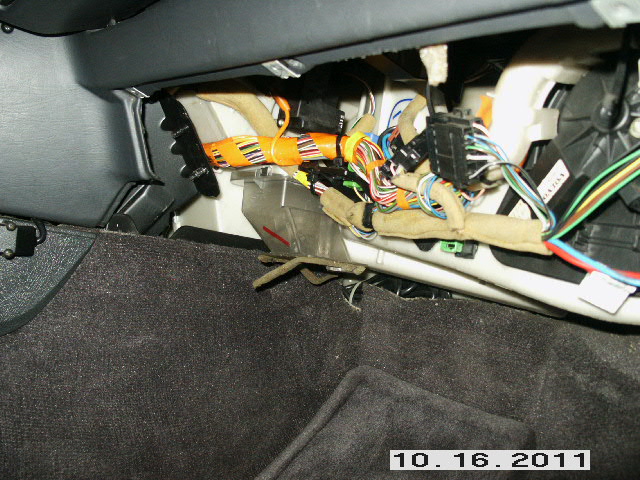
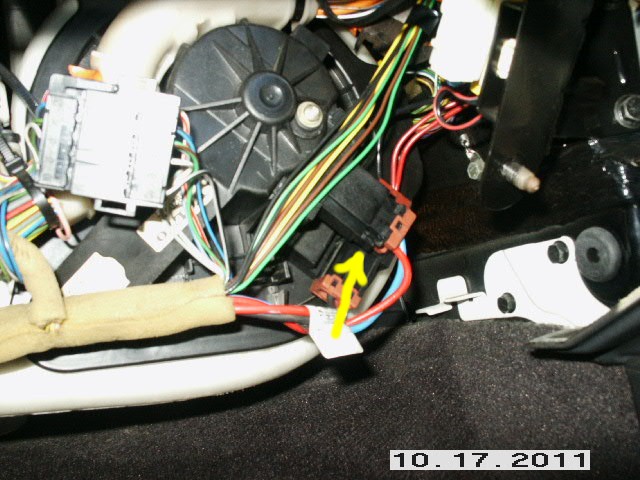
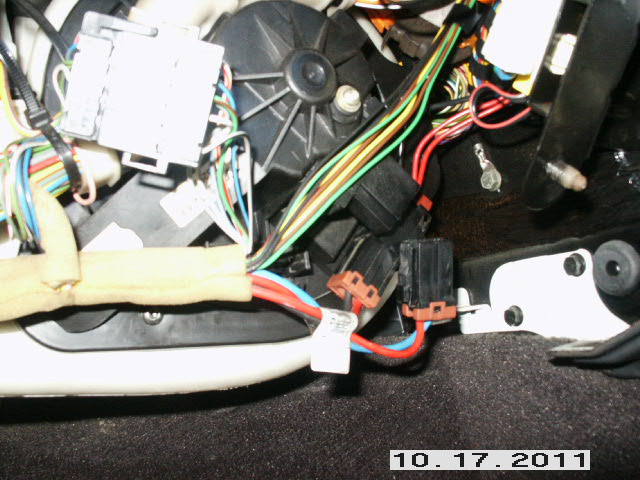
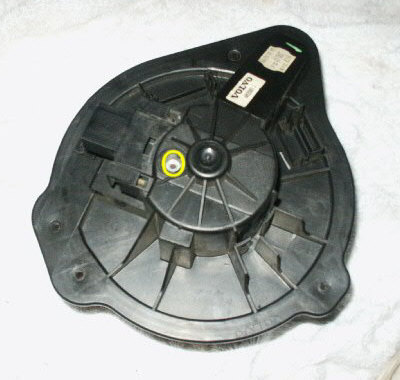
Unplug the wire from the motor. Then one in the center pointing away from the motor. It has a tab on the left side of it.

-
Remove the other connectors from the motor. They slide off the motor together. Slide them to the right towards the 3 o'clock position. You wont have to unplug them, just get them off the motor housing.

-
Slide the wires that go over the top of the motor off. Just pull them and they will come off the motor housing.
-
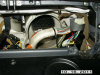
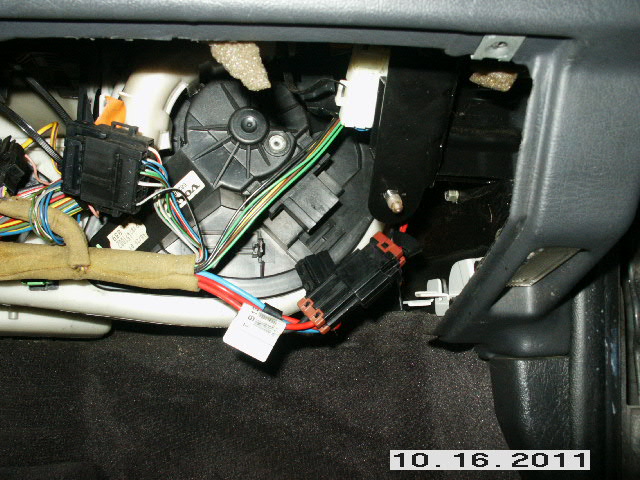
Remove the 4 screws that hold the motor in. They are T-25 screws. One at 11 o'clock, one at 2 o'clock, one at 3 o'clock, and the last one at 7 o'clock. The one at 2 and 3 o'clock had to be removed with the small ratchet adapter. Once you have the screws out the motor will work out and down.

-
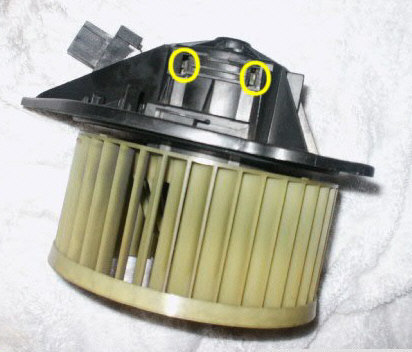
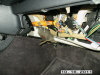
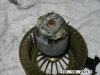
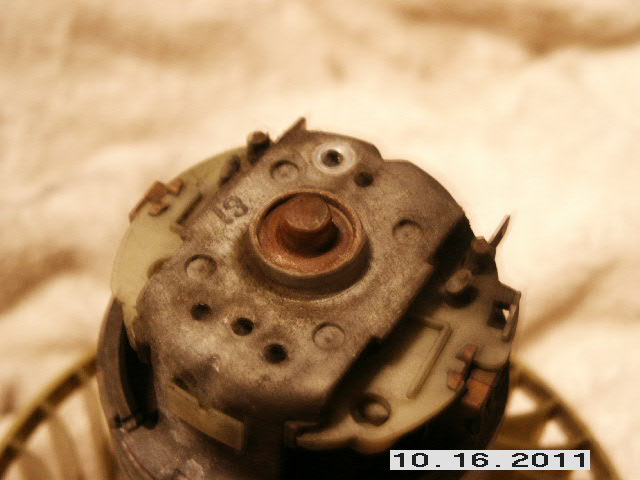
Once you have the motor out, there is a screw and rubber gasket in the back of the housing. Remove the 1 screw with the T-15 bit.
-
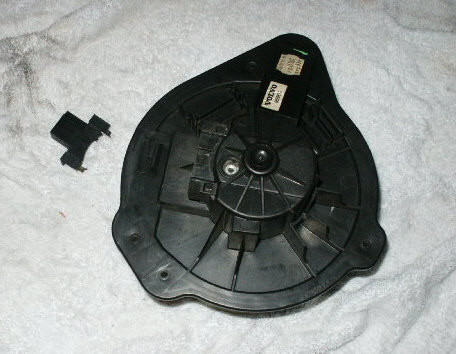
Take off the plug adapter from the housing. It has 2 tabs where it meets the most center part, pull up on those tabs and work the connector off.

-
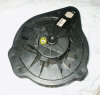
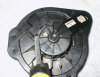
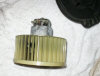
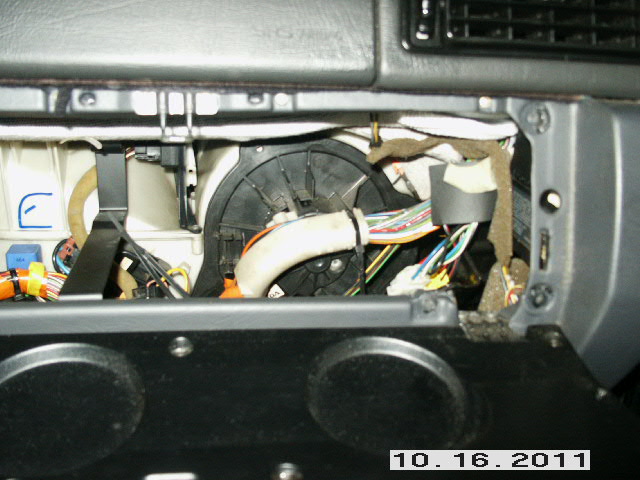
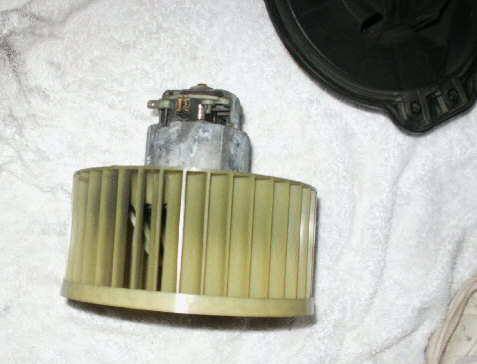
Hold the motor housing between your feet and pull the fan cage, it will slide the motor out of the housing.
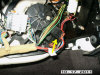
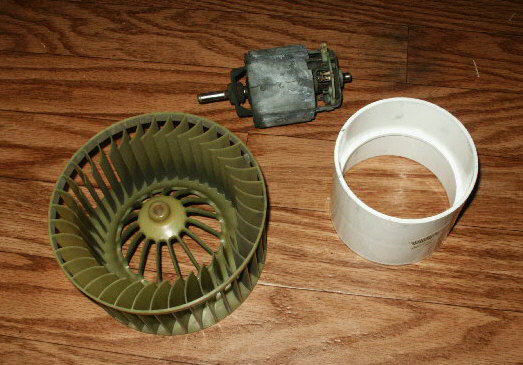
NOTE: Once you have the motor out of the housing, it is hard to lubricate the cage end of the motor without removing the cage so I took the cage off of the motor shaft.
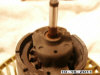
-
Find something to support the cage so the motor will hang between it and tap the shaft through the middle until it is flush with the cage. Once the shaft is flush use the Phillips screw drive or a punch to drive it the rest of the way out.
WARNING: Do not bang on the cage to hard you may break it.
NOTE: Make a note of how far the shaft extends out of both ends of the motor and cage so you can put it back together properly.

-
Shake the can of grease and lube both ends of the motor. Make sure you lube the ends good but do not get lube in the electrical part of the motor, it may stop it from working.

-
When done, install the cage on the shaft. I rested the motor side of the shaft on the ground when tapping the cage back on to avoid damaging the motor.
-
When you put the motor back in the housing, make sure you line up the electrical connectors in the housing so it goes into the housing properly.


Please leave a donation, see the bottom of this page.
End of instructions.