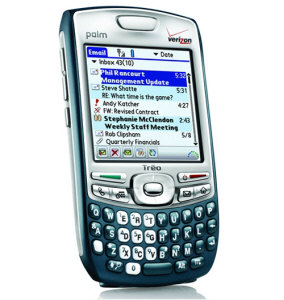
Palm Treo 755p Display Repair / Replacement

These instructions will guide you through the assembly process of the Palm Treo 755p phone. My phone display was not working properly. I had to recalibrate the touch screen over and over again. I believe the problem started when I removed a screen protector. It damaged the display digitizer. The display actually has 2 parts, the display and the digitizer. The digitizer is the part that you actually touch, the display is behind it. If you have a cracked digitizer the screen will still show a good picture. The digitizer has two layers, a thin plastic sheet and the glass under it. So it is possible to crack the digitizer and still have a good display.
Palm told me that they could fix my phone for $195.00. You can DIY for much less. I purchased the digitizer for under $6 on eBay and the display unit, digitizer included can be purchased for less than $20 on eBay.
These instructions can be used for replacing a number of parts on this phone. From the display assembly, keyboard, speaker, or mother board. These instructions may also work on other treo phones in the Palm series, i.e. 600, 650, 700, etc.
Tools Needed:
| #5 Torque Screw Driver | #0 Phillip Screw Driver |
| #2 Flat Tip Screw Driver | Eye Glasses Cleaning Cloth |
| Eye Glasses Cleaning Solution | |
Instructions: Read each step in it's entirety before doing the procedure. It will help you avoid breaking parts, etc.
- Power off the phone.
- Remove the back cover.
- Remove the battery.
- Remove the stylist.
- Open the external antenna cover.
- Remove the 6 screws from the back of the phone with the torque
driver.

- Carefully pry open the phone, back from front. Here are several
pictures that shows you what parts are attached to the top and what
are attached to the bottom. I used the flat tip screw driver to help
me with this.
WARNING: There are wires and a ribbon connecting the halves so do not pull it all the way apart.
- Release the ribbon that connects the keyboard to the mother
board and unplug it.

- Unplug the speaker wire (not required).
- Remove the screw from the mother board that attaches it to the
faceplate.

- Lift the mother board from the faceplate.
- Release the display ribbon from the mother board.
- Remove the display.
- Starting at the edge of the display that is opposite the ribbon
for the digitizer, pry apart the digitizer from the display. I
cracked my digitizer while separating it.
- Once the digitizer is loose from the display, peal back enough
of the protective tape from the back of the display that covers the
digitizer ribbon connector.
- Release the ribbon from the back of the display. The opposite
end of the ribbon connector has a latch. The ribbon goes in one end
the latch is on the other end.

- Plug in the new ribbon, make sure it is through the ribbon
connector far enough to be secure in the plastic securing clip.
- Re-apply the back tape to cover the connection.
- Make sure the display is clean and finger print free. If not, clean it.
- The digitizer has a clear plastic screen protector on both sides
of it, remove the inside protector, align the screens and gently
squeeze them together.
- Place the display in the phone and attach the display ribbon to
the mother board. Make sure the ribbon is pushed all the way into
the connector before you secure the latch. The ribbon has a line on
it, try to insert the ribbon so that the line is in further than the
edge of the bracket.
NOTE: If you fail to secure the display ribbon all the way into the mother board connector the display will NOT light up when you turn the phone back on. - Remove the front screen protector from the digitizer.
- Go to item 11 and follow the instructions in reverse order to get the phone back together.
Please leave a tip, see the bottom of this page.
End of instructions.